TABLE OF CONTENTS
Experience the Future of Speech Recognition Today
Try Vatis now, no credit card required.
Knowing how to extract the sound from a video is one of those surprisingly simple skills that pays off big time. At its most basic, it's just a matter of opening your video in a tool like VLC Media Player, heading to 'Convert / Save,' and choosing an audio format like MP3. Just a few clicks and you’ve got a standalone audio file, ready for a whole new life.
But why bother? This guide will show you exactly why and how, with practical steps and examples you can use today.
Why You Should Extract Audio from Video
Stripping the audio from a video file isn’t just a tech trick—it’s a gateway to making your content work harder for you. By isolating the sound, you unlock a completely new asset that you can edit, analyze, share, and repurpose in countless ways. It's the first step to getting more mileage out of the content you already have.
Imagine you just wrapped up a one-hour webinar packed with great insights. Instead of letting it just sit on YouTube, you can pull the audio and instantly have a new podcast episode. This is a perfect way to reach people who prefer listening during their commute or at the gym. In fact, it’s become a go-to strategy for creators who want to turn YouTube into a podcast and tap into a whole new audience.
Practical Scenarios for Audio Extraction
The uses go far beyond just podcasting. Journalists and researchers do this all the time with long-form interviews or press conferences. Extracting the audio makes it infinitely easier to scrub through the conversation and find the exact soundbites they need for a story or a research paper. No more re-watching hours of video.
A clean, high-quality audio file is the foundation for effective content repurposing. It ensures that whether you are transcribing a meeting, creating a podcast, or archiving important dialogue, your source material is as clear and usable as possible.
This process is also a game-changer for accessibility and analysis. For example, if you need to transcribe an important company meeting, sending a dedicated audio file to an AI transcription service almost always yields better, more accurate results. The software has less to process without the video data.
Here are a few common situations where this skill comes in handy:
- Content Repurposing: Turning video testimonials from customers into punchy audio clips for your website or social media ads.
- Professional Archiving: Storing the audio from legal depositions or corporate town halls in a lightweight, easy-to-search format.
- Creative Projects: Sampling dialogue or unique sound effects from video clips to use in music production or sound design.
- Study and Research: Extracting lectures or interviews to listen to while multitasking or to easily transcribe for note-taking.
Ultimately, knowing how to separate audio from video is a fundamental skill for anyone creating or managing digital media in 2026. It unlocks a world of potential for the video assets you've already worked hard to create.
High-Quality Audio Extraction with Desktop Software
When you need total control and professional-grade results, desktop software is the only way to go. Forget the upload limits and privacy concerns of online converters. These applications work entirely offline, giving you the power to handle large files and preserve every bit of audio quality.
Here’s how to tackle audio extraction using three of the best free tools out there: VLC, Audacity, and QuickTime, with practical steps for each.
Using VLC Media Player for More Than Playback
Everyone knows VLC as the media player that handles any format you throw at it. But its hidden superpower is a robust conversion tool that’s perfect for stripping audio from a video file without any quality loss.
Here's the step-by-step process:
- Open Media: In VLC, go to
Media>Convert / Save. - Add Your File: Click
+ Add...and select the video file you want to extract audio from. Then clickConvert / Saveat the bottom. - Choose Audio Profile: In the
Profiledropdown menu, select an audio format likeAudio - MP3orAudio - FLAC. - Set Destination: Click
Browseto choose a name and location for your new audio file. Make sure to add the correct extension (e.g.,.mp3). - Start: Click
Startto begin the conversion.

Pro Tip: If you have a dozen videos to process, don't do them one by one. In the 'Open Media' dialog (Step 2), you can add multiple files. Once you set your audio profile, VLC will work through the whole batch automatically. It’s a massive time-saver.
Going Further with Audacity and FFmpeg
Audacity is the gold standard for free, professional-grade audio editing. It’s my go-to when I know the audio needs a little cleanup right after I extract it.
The catch? Audacity can’t open video files on its own. It needs a little help.
You’ll have to install the free FFmpeg library first. Think of it as a translator that lets Audacity understand video formats. It’s a one-time setup, and once it's done, you can drag any video file directly into Audacity. The software will automatically extract the audio and display the waveform, ready for you to edit.
The first thing I do after extracting audio in Audacity is run a 'Noise Reduction' effect. Just capture a noise profile from a few seconds of silence, then apply the filter to the entire track. It's the quickest way to clean up distracting background hiss.
The Quickest Method for Mac Users with QuickTime
If you’re on a Mac, you already have a fast, no-fuss extraction tool built right in: QuickTime Player. You don't need to install anything.
- Open your video file in QuickTime Player.
- Go to File > Export As > Audio Only.
- Give your file a name, choose a location, and click
Save.
QuickTime instantly exports a high-quality .m4a (AAC) audio file, which is perfect for just about anything, from creating podcast clips to preparing audio for transcription. It is, without a doubt, the fastest way to pull audio on a Mac.
While these free tools are fantastic for most tasks, if your workflow demands more advanced controls or specialized features, you might want to explore a dedicated application like Lunabloom AI.
Using Online Converters for Fast and Simple Extraction
What do you do when you need the audio from a video right now? Maybe you don't have the time or permissions to install new software, and you just need to grab the sound from a quick YouTube clip or a file on your desktop. This is where online converters are incredibly useful.
For those one-off tasks, these web-based tools are hard to beat for sheer convenience.

It's a pretty straightforward deal. You find a site, upload your video file or paste in a URL, select your audio format (MP3 is almost always an option), and hit the convert button. In a few moments, you get a download link. Simple.
But that convenience comes with a catch, especially when it comes to your privacy and dealing with large files. It's crucial to know their limits before you upload.
The Trade-Off: Convenience vs. Security and Limits
Online converters are perfect for anything that’s already public. If you're just pulling a song from a public YouTube video to listen to offline, the risk is practically zero. The moment you’re working with private or confidential video, however, the game changes completely.
Let me be direct: when you use an online tool, you are uploading your data to someone else's server. For a confidential business meeting, a sensitive interview, or a personal family video, this is a security risk you shouldn't take. Always use offline desktop software for private content.
Beyond security, you'll run into practical walls. Most free online tools have strict limits on file size or how many conversions you can do in a day. They’ll handle a 50 MB file without breaking a sweat, but they will almost certainly choke on a 5 GB recording of a two-hour conference.
If you’re specifically looking to convert YouTube content, there are more specialized tools available. We cover those in-depth in our guide on how to use a YouTube to MP3 converter.
When to Use an Online Extractor
So, when does an online tool make sense? Think of them as your go-to for quick, low-stakes jobs.
- Saving audio from social media: You found a great sound bite on a public video and want to save just the audio track.
- Grabbing public lectures: You need the audio from a lecture posted online to study on the go.
- Quick personal projects: You're turning a short, non-sensitive family video into an MP3 to share with relatives.
Here’s a quick breakdown to help you decide which path to take:
| Feature | Online Converters | Desktop Software (e.g., VLC) |
|---|---|---|
| Speed | Depends on your internet and their server load | Fast; limited only by your computer's power |
| Security | Low; files are uploaded to third-party servers | High; files never leave your machine |
| File Size Limit | Often limited (e.g., under 1 GB) | Virtually unlimited; great for huge files |
| Best For | Quick, non-sensitive, small files | Secure, large, or batch processing jobs |
Knowing the difference is everything. For casual use with public content, an online converter is a fantastic, hassle-free resource. For anything professional, large, or private, you should always stick with a trusted desktop application.
Choosing the Right Audio Format for Quality and Purpose
So, you’ve successfully pulled the audio from your video. Now for the crucial part: what format do you save it in? This decision isn't just a technical detail—it directly impacts your file size, audio quality, and even how accurately it can be transcribed later.
The choice really boils down to two categories: lossy and lossless. Getting this right from the start saves a ton of headaches down the road.
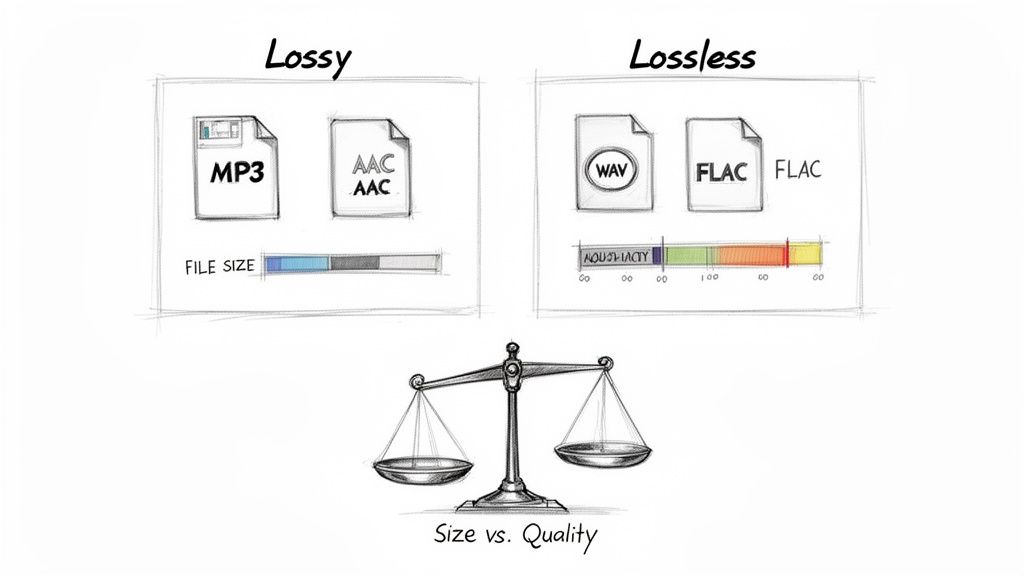
Lossy formats work by cleverly shaving off bits of sound data that most human ears won't miss, resulting in a much smaller file. Think of them as the efficient, everyday option. Lossless formats, on the other hand, are the archival-grade purists. They keep every single bit of the original audio, giving you a perfect, uncompromised copy.
To make it even clearer, let's break down the most common formats you'll encounter.
Audio Format Comparison: Lossy vs Lossless
This table will help you quickly decide which format fits your needs, whether you're prioritizing quality, file size, or compatibility.
| Format | Type | Best For | Key Characteristic |
|---|---|---|---|
| MP3 | Lossy | Sharing, streaming, podcasts | The most universally compatible format; plays on virtually any device. |
| AAC | Lossy | Streaming, online video audio | More efficient than MP3; offers better quality at the same file size. |
| WAV | Lossless | Professional editing, archiving | Uncompressed and raw; the gold standard for audio production. |
| FLAC | Lossless | Archiving, high-fidelity playback | Perfect, bit-for-bit quality but with 30-50% smaller files than WAV. |
Choosing the right format really depends on what you plan to do next with the audio file.
Lossy Formats For Convenience And Sharing
Formats like MP3 and AAC are all about practicality. They strike a great balance between decent audio quality and small file sizes, which is why they dominate the world of streaming and sharing.
MP3 (MPEG-1 Audio Layer III): This is the old reliable. If you're turning a webinar into a podcast episode or just need to share a quick audio clip with your team, MP3 is a safe bet. Its universal compatibility means you'll never have to worry about whether someone can play it.
AAC (Advanced Audio Coding): Think of AAC as the modern successor to MP3. It’s more efficient, meaning it generally sounds a bit better than an MP3 at the same bitrate. This is why it’s the format of choice for giants like YouTube and Apple Music.
For most day-to-day tasks where you just need to listen to the content—like sending an audio version of a video interview to a colleague—a high-quality MP3 is almost always your best move. It's small, convenient, and gets the job done.
Lossless Formats For Quality And Archiving
When every detail matters and audio quality can't be compromised, you need to go lossless. The files are significantly larger, but what you get in return is a perfect replica of the original audio stream.
This level of quality is absolutely essential for professional workflows, especially when feeding the audio into transcription software. Maximum clarity leads to maximum accuracy. You can see the supported languages and formats that work best with transcription engines to get the most accurate results.
WAV (Waveform Audio File Format): This is the uncompressed workhorse of the professional audio industry. If you plan on doing any serious editing in a program like Adobe Audition or Pro Tools, or if you're archiving a master copy for future use, WAV is the only way to go. It’s the raw, untouched data.
FLAC (Free Lossless Audio Codec): Here's where you get the best of both worlds: perfect, lossless quality in a smaller package. FLAC uses a smart compression method to shrink file sizes by 30-50% compared to a WAV file, all without losing a single bit of information. It's the ideal choice for archiving high-fidelity audio or for transcription, where an AI needs the cleanest possible signal to perform its best.
Turning Your Extracted Audio into Actionable Insights
So, you’ve got your clean audio file. That's a great first step, but the real value is still locked inside the recording itself. The spoken words in your video are a goldmine of data, but listening back is painfully slow. This is where you can turn raw sound into something you can actually read, search, and analyze.
AI-powered transcription has completely changed this process. What used to take days of manual typing can now be done in minutes.
From an Audio File to a Searchable Document
Think about it. You just pulled the audio from a two-hour legal deposition or a long, winding board meeting. Trying to find one specific comment by scrubbing through the timeline is a nightmare.
But what if you could just hit Ctrl+F? By running that MP3 or WAV file through a transcription service, the entire conversation becomes a searchable document. You can find keywords, identify who said what, and pull direct quotes in seconds.
The workflow is dead simple:
- Extract your audio, preferably in a high-quality format like WAV or FLAC.
- Upload it to a transcription platform like Vatis Tech.
- The AI processes the audio, generating a full transcript with timestamps and speaker labels.
That's it. Hours of unstructured talk are suddenly organized and accessible, saving you an incredible amount of time.
The real point of transcription is to turn passive audio into an active asset. It’s the bridge between just having a recording and actually using the information trapped inside it.
The tech for pulling audio from video has come a long way, especially since the mid-2010s. It's not just about separating tracks anymore. Back in 2014, researchers from MIT, Microsoft, and Adobe developed an algorithm that could reconstruct speech just from the tiny vibrations of objects in a silent video.
They managed to recover understandable speech from a potato-chip bag filmed from 15 feet away through soundproof glass. This experiment showed just how much information is hiding in plain sight—or sound. You can read about the visual microphone findings on MIT's news site if you're curious about the wilder side of audio extraction.
Real-World Applications for Transcribed Audio
This isn't just a neat trick; it's a workflow that solves real problems across dozens of fields.
For journalists, it means grabbing quotes and fact-checking interviews in a fraction of the time. Legal teams get a searchable record of every deposition and court proceeding. Marketers can analyze customer feedback from video testimonials to find common themes and powerful quotes.
By pairing audio extraction with smart transcription, you can finally put your video content to work. If you're ready to see how this fits into your own projects, you can explore the process of converting your audio to text with high accuracy. This is how modern teams are unlocking the valuable data trapped inside all those video and audio files.
Got Questions About Audio Extraction? We've Got Answers.
When you're first figuring out how to pull audio from a video, a few questions always pop up. Getting them sorted out early will save you headaches, protect your audio quality, and keep you on the right side of the law. Let’s tackle the most common ones we hear.
Will Ripping the Audio Wreck Its Quality?
This is a huge concern for a lot of people, but here's the short answer: no, not if you do it right. Extracting the audio stream is like making a perfect digital copy. The audio you pull out will be identical to the original track living inside the video file.
The real danger zone is when you save or export the file. If you save the audio in a heavily compressed format, like a low-bitrate MP3, you're literally throwing away sound data, and the quality will drop.
To keep every bit of quality, save the file in a lossless format like WAV. If you need a smaller file size, go for a high-quality compressed option, like a 256kbps MP3 or higher. Anything less, and you'll likely notice the difference.
Am I Legally Allowed to Extract Audio from Any Video?
This is where it gets a little murky. The answer really boils down to two things: who owns the video and what you're planning to do with the audio.
- Your own content? Go for it. If you created the video, you own the rights. It’s perfectly legal to extract the audio for any purpose.
- Someone else's copyrighted video? Be careful. Ripping the audio from a movie, a TV show, or a commercial YouTube video for your own project can land you in hot water for copyright infringement.
Your intended use is what matters most. If you're using a short clip for personal study, research, commentary, or news reporting, you might be covered by "fair use" provisions. But "fair use" can be a legal gray area, so always be cautious. If you plan to use the audio publicly or commercially, make sure you have the rights first.
What's the Best Free Software for Extracting Audio?
For most day-to-day tasks, you can't go wrong with VLC Media Player. It's the Swiss Army knife of media players—it’s free, works on Windows, macOS, and Linux, and opens almost any video format without needing extra downloads. It’s reliable and gets the job done.
If you know you’ll need to clean up or edit the audio right after extracting it, then Audacity is your best bet. It’s a powerful, free audio editor. Just a heads-up: you'll need to do a one-time install of the free FFmpeg library to let Audacity open video files directly.
How Should I Deal with Really Big Video Files?
If you're working with a massive video file—think anything over a gigabyte—skip the online converters. They just aren't built for heavy lifting. You'll run into strict upload size limits, and even if your file is accepted, the upload process is painfully slow and often times out or fails.
Stick to desktop software. Applications like VLC, Audacity, or a command-line tool like FFmpeg process the file on your own machine. It's not only way faster and more reliable, but it's also completely private since your files never get uploaded to a third-party server.
Ready to turn those extracted audio files into searchable, actionable insights? Vatis Tech provides industry-leading AI transcription with over 98% accuracy. Upload your audio and get a precise transcript in minutes.